Small Business Blog
Bookkeeping Insight
Do you remember your first few hours with QuickBooks Online? Unless you went through a structured training course, you may have just poked around until you figured out how to connect your bank accounts and create invoices and sales receipts and record payments.
If you didn’t thoroughly explore the Account and Settings pages, though, you may be missing out on some of the capabilities and options that QuickBooks Online offers.
No one uses 100% of the features found in any online application. But it would be unfortunate if you weren’t taking advantage of all of the flexibility and functionality that QuickBoo0ks Online offers.
All In One Menu
You’ll be able to find all of the options we’ll discuss here by clicking the gear icon in the upper right and selecting Account and Settings under Your Company . This page is divided into several sections, divided by tabs on the left side of the page.
Add or Delete Fields In Sales Forms
Start by clicking Sales . Under Sales form content , you’ll see several options related to the look and content of your sales forms (like invoices). To edit these, click the pencil icon in the upper right corner of that section.
QuickBooks Online offers several options related to the content of your sales forms.
In the image above, you’ll see some of your options here. You can turn them on and off by clicking the buttons to their right. Green means the preference or field is turned on. You can change these at any time, but keep in mind that your modifications will only apply to future transactions. If you have questions about a particular entry, click the question mark icon to get a brief explanation.
If you want to add custom fields to your forms, click that hyperlink to go to the Custom fields page and click Add field .
Pay Bills and Record Expenses
Click the Expenses tab. Most of the options here are grouped under Bills and Expenses . The rest have to do with purchase orders, which you may or may not have in your version of QuickBooks Online. Tracking purchase orders is a complicated process. We can help you get started with these if you need them.
Some of these concepts, like treating billable expenses and items as income, are complicated. We can explain how this works.
Some of the options in the image above are self-explanatory, like including a Product/Service table on transactions so you can itemize what you sell. Sales tax (not shown here) and billable expenses are more complicated. Let us help you get these tools right from the start.
Track Time
Click the Time tab. The questions here are simple. Do you want your sales forms to display a field for services rendered? Should you be able to designate time as billable? Do you want users who are entering their time to see the billable rate (usually not a good idea)?
Advanced Settings
There’s a lot in this section, some of which involves basic questions about your preferences for things like date and number format, account numbers, and accounts for shipping, discounts, and markup. QuickBooks Online’s default settings may be fine, or you may want to alter them. You may also have already established some of these settings, like the first month of your fiscal year and your accounting method.
Warning: If you’re uncertain about the difference between cash and accrual and don’t know which one you should be using, contact us soon. It’s important.
There are two sections here, though, that you should definitely visit:
Do you want QuickBooks Online to take some actions automatically?
· Automation . QuickBooks Online can take some actions automatically, but consider carefully whether you want it to do so. For example, should unbilled activity be automatically invoiced? Should credits be applied automatically?
· Categories . You can request that fields be added to transactions for Classes and Locations . This helps you assign transactions to different segments like departments, locations, and product or service lines.
Reading through QuickBooks Online’s Settings pages may alert you to preferences, capabilities, and features that you didn’t know about. It can also make your accounting data more accurate and useful. If you have questions about any of these and want to learn more about how they might affect you, let us know. We can set up a time to go over them and to address any other questions you might have about QuickBooks Online.

QuickBooks Online is a great tool for creating, storing, and sending sales and purchase forms, and for building detailed customer and vendor profiles. Maybe that’s all you want it to do. But to get the most out of this web-based accounting application, you should really be using its classification tools so you can view related transactions as groups and learn how specific parts of your business are doing.
Tags are the newest tool for this task. They’re customizable labels that allow you to track whatever you want, for whatever elements of your business that you want to track. You could determine how much you’re making and spending on different jobs. You could also track transactions related to, for example, ad campaigns, sales reps, and project managers. You’ll create and store tags as groups that you can view on one page. You can add them on the fly, and even run specialized reports. They’re extremely flexible tools that help you analyze your business in unique ways.
How Are They Different?
You may have encountered tags in other applications. In QuickBooks Online, they’re different from the other classification tools provided. You’ll assign categories to transactions primarily for tax purposes (how much did you spend on advertising or utilities or deductible meals?). Classes help you separate groups of income and expenses for job costing, budgeting, etc. And locations allow you to track income, expenses, and assets by geographic locations.
Tags, on the other hand, are unlimited. You can track virtually any related sets of transactions.
How Do You Create Tags?
Before you can start creating tags, you have to create a Group to assign them to. Click the gear icon in the upper right and select Tags under Lists . This will take you to the Tags home page. Click New and then Tag group . A vertical pane will slide out from the right. Choose a Group name and specify a color. Click Save . Add a tag in the Tag name field and click Add .
Once you’ve created a group, you can start adding tags.
Keep adding tags until you have all you want. You can always add more later. When you’re finished, click Done . Back at the Tags home page, you’ll see your new group listed.
How Do You Use Tags In Transactions?
Tags have no impact on your accounting books. They simply provide information to you in lists and reports.
Let’s say you run a small clothing store. You want to be able to see quickly which seasons have the most sales and which employees sell the most. You could create two groups: Clothing seasons and Employees . You want to create sales receipts to compare seasonal and by-employee sales.
Click New in the upper left corner and select Sales receipt under Customer . Select the Customer name or + Add new . Or leave it blank since it’s not required here. Check the date . Click in the Tags field to open your options there. Choose the season and the employee. You are allowed to assign as many tags as you like to a transaction, but only one for each group. Complete the rest of the receipt and save the receipt. You can add tags to any transaction that contains a field for them.
You can add tags to any transaction that contains a field for them.
If you go back to the Tags home page, you’ll see that each of the tags you just assigned contain an entry for 1 transaction in the Transaction column. Click Run report to see a Profit and Loss by Tag Group report. You’ll also find this report when you click Reports in the toolbar. In addition, you’ll find the Transaction List by Tag Group report. And you can always return to the Tags home page to see your groups, tags, and related transactions in list view.
What If You Don’t Want To Track Tags?
If you don’t plan to use tags (at least not right away), you can turn the tag field off on transactions. Click the gear icon in the upper right, then select Account and settings . Click the Sales tab in the toolbar. At the bottom of the first section here, Sales form content , you’ll see Tags . Click it, then click the on/off button until the green area disappears. Then click Save . Click the Expenses tab and turn off the line that reads Show Tags field on expense and purchase forms . Click Save .
Make Use of QuickBooks Online’s Classification Tools
Like we said earlier, QuickBooks Online works great for creating records and transactions and running reports. But you’ll understand just how powerful it is at making connections between related data by using classes, categories, locations, and now, tags. Still confused about the differences between these tools and how you would use them to get the information you need? Let’s set up a session to go over them and to answer other questions you might have about QuickBooks Online.
Adding employees to your staff is reason to celebrate. It means you’re growing enough that you need to bring new people on board to get all of your work done.
Adding employees that need access to your QuickBooks Online data, though, requires a high level of trust. Those individuals will be able to see a lot of very sensitive company, customer, and vendor information. You need to make sure that they can only view what they need to and that their ability to enter and modify data is limited.
QuickBooks Online makes this possible with its user management tools. You can provide users with their own login information that restricts where they can go and what they can do. Here’s how it works.
Types of Users
Warning: Your QuickBooks Online subscription allows you to invite a specific number of employees, though you can add more. Ask us about this.
To set up a new user, click the gear icon in the upper right. Select Manage users under Your Company . Or click Get things done in the toolbar and select the Manage users icon in the Company box.
Click the Manage users icon to add a new user to your QuickBooks Online account.
You’ll see a table with your own account information listed there. Click Add user in the upper right. In the window that opens, you’ll have to choose a user type . This can be a:
● Company admin . This user could see and do everything, like adding users and sending money.
● Standard user . This user would have full or limited access, without admin privileges.
Both of these user types would count toward your employee limit. You can also invite someone to have access to Reports only, excluding payroll and contact information (wouldn’t count toward your user limit).
Choose Standard user and select Next in the lower right. The page that opens asks you how much access the individual should have. Your options are:
● All , including or excluding Payroll .
● None . User could, though, manage some things and submit timesheets.
● Limited . You can allow access to Customers and/or Vendors , with access rights spelled out.
QuickBooks Online shows you what specific users’ access rights are.
After you’ve made your selection on this page, click Next in the lower right. You’ll answer a few Yes , No , or View only questions, things like Do you want this user to add, edit, and remove users? Click Next and provide the user’s name and email address. He or she will receive an invitation (good for 30 days) to set up a password and log in. Click Save to be returned to your user access list. Your user can log in after accepting your invitation.
Other Ways to Keep Your Data Safe
Limiting access for other employees who must log into QuickBooks Online is one way of safeguarding your company file data. Here are some additional suggestions:
● Try to avoid printing data other than necessary transactions from your QuickBooks Online file. When you do, either store it in a secure place or shred it when you’re done with it.
● Keep your networks safe . Create policies and put them in writing for employees. Don’t allow workers to download apps onto their work computers, and discourage unnecessary web browsing. Encourage them to practice good email hygiene (no clicking on links or attachments unless they’ve requested the information). Consider network monitoring software, or, if your company is big enough, managed IT.
● Protect data remotely . If you or your employees have company-issued phones with QuickBooks Online data on them, stress to them that they should never use those phone on public Wi-Fi networks.
● Don’t leave QuickBooks Online open when you’re not at your desk.
● Update your applications and operating system when necessary . QuickBooks Online updates itself, but many other applications don’t. These updates sometimes contain system security patches in addition to new features.
One serious security breach could shut you down. Follow these best practices to avoid hackers and other intrusions that could seriously compromise your data or put it in the wrong hands. Your customers, vendors, and employees entrust sensitive information that you’ve added to your QuickBooks company file. Continue to earn their trust by protecting their data as well as your own.
Questions about system security or about QuickBooks Online features? We’re here, and we stand ready to share our accounting expertise with you. We want to see you succeed, and good financial records are essential in making that happen.
One of the biggest problems small businesses face is maintaining a positive cash flow. It’s a constant battle. How do you keep your income running ahead of your expenses?
QuickBooks Online can help. It provides specialized forms and a mobile app that help you record and deposit the payments that are coming in. Do you ever receive payments instantly for some products and/or services? Are you ever out of the office and have to document a sale for both you and the buyer? Do you send invoices for products and/or services and need to make sure that payments get reported accurately when they come in?
QuickBooks Online supports all of these situations. It also provides a service that can automate your payments and help you get paid faster.
Applying Payments to Invoices
If you send invoices to customers for products and/or services, you can receive their payments easily using QuickBooks Online. Businesses can record payments manually, but there’s a better way that can help you get paid faster: QuickBooks Payments . This is a merchant account that allows you to accept credit card and bank payments electronically.
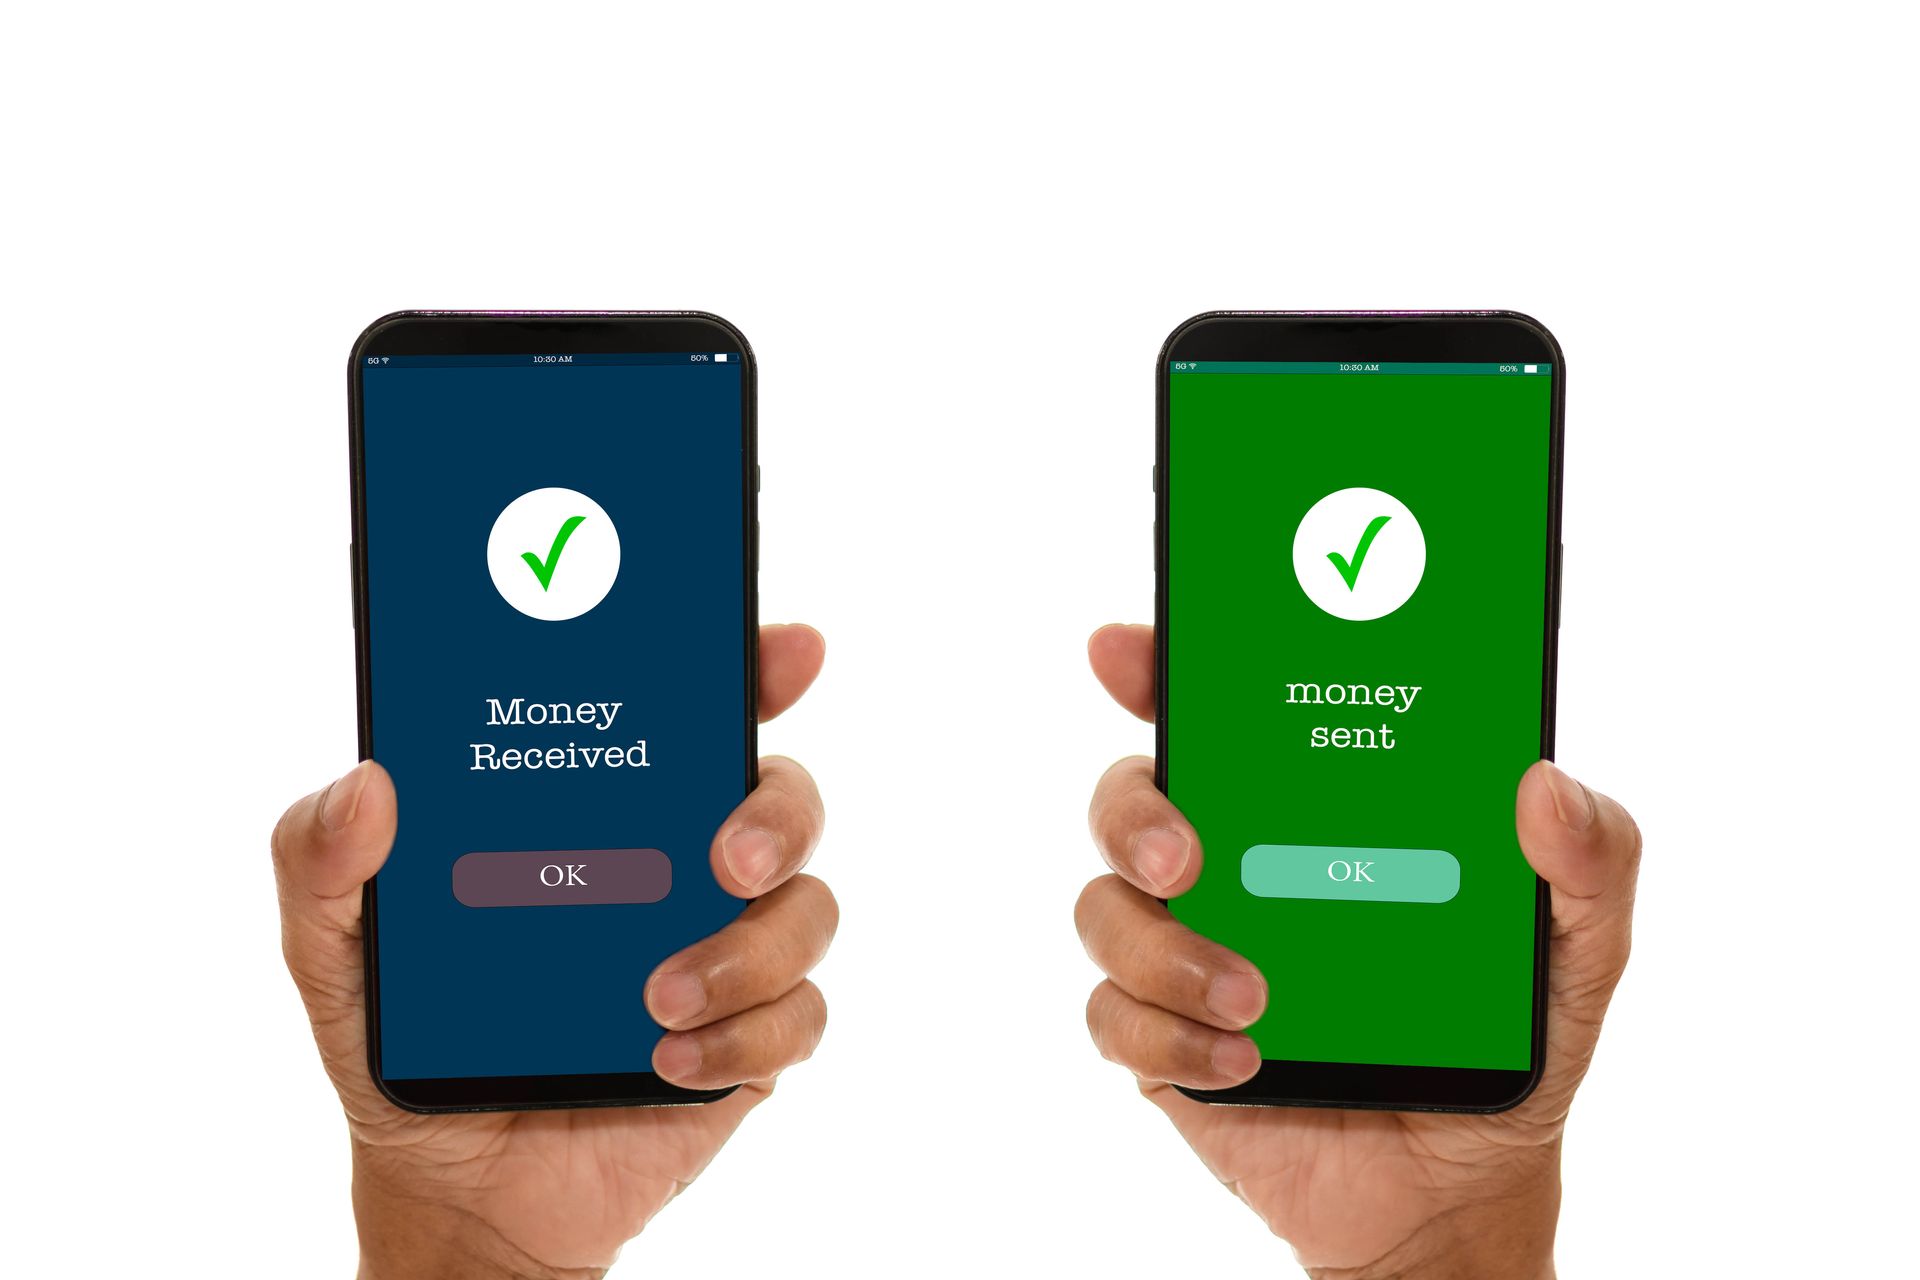
Using QuickBooks Online’s mobile app, you can check the payment status of an invoice.
Once you set this up in QuickBooks Online, your invoices will allow bank cards and electronic checks as integrated payment options. Your invoices will go out with a button that customers can click to provide bank card or check information. You’ll be able to see when invoices are viewed, paid, and deposited, as shown in the image above. You can also get notifications of invoice activity.
Of course, you can also check the payment status of the invoices you’ve sent in the browser-based version of QuickBooks Online on your desktop or laptop. Open your list of invoices on the site and click on one to highlight it. A panel will slide out from the right side of the screen displaying the invoice’s timeline.
You can also record payments manually. Look at the end of the row for an invoice that hasn’t been paid. You’ll see a Receive Payment link. Click it to open the Receive Payment screen and complete the fields that aren’t already filled in, then save the screen. There’s also a Receive Payment link on the invoice screen itself.
You can record payments for invoices manually from the Invoices screen.
There’s no cost for setting up an account in QuickBooks Payments. There are only per-transaction fees. For ACH bank payments, the rate is 1%, with a maximum of $10 per transaction. Credit and debit cards (plus PayPal, Apple Pay, and Venmo) are 2.9% if they come in through an invoice, 2.4% if you use a card reader, and 3.4% if the payments are keyed in. There’s also a $0.25 fee per transaction. Payments that come in before 3 p.n. PT should be in your account the next business day.
Payments On the Road
To accept payments remotely, you’ll need to get a free card reader from Intuit that attaches to your mobile phone. Customers can tap or insert their cards or make digital wallet payments. You can also key numbers in, but, as we said earlier, the per transaction fee is higher. You’ll also need to download the GoPayment app to process transactions. The app also allows you to add labels, prices, and images so you can find the item you’re selling quickly. Multiple security measures are used to help keep this method of mobile data transmission safe.
Receiving Payment Instantly
There may be times when you provide a product or service for someone and they pay you on the spot. QuickBooks Online allows you to create and send sales receipts for just those occasions. Click +New in the upper left corner, and then click Sales receipt under Customers . QuickBooks Online then opens a form that should look familiar to you. It looks and works like an invoice or estimate. Select the Customer in the upper left corner and complete the rest of the fields as you would with any sales form. If you click Save and send when you’re done to email a copy to the customer, you can see a preview first.
About Receiving Checks
Money from payments you’ve received sometimes* go into the Undeposited Funds account.
When we created a sales receipt just now and indicated we’d received a check, the Deposit to field defaulted to Checking , because QuickBooks Online assumed we’d be depositing this check on its own. When you have multiple checks that you’re going to combine into one deposit, you should have the payment deposited to the Undeposited Funds account. This is an account that holds any payments that have come in but not yet been physically deposited in the bank (usually cash and paper checks from invoices and sales receipts). It’s a good idea to look at this account occasionally to make sure you don’t have money just sitting there.
Questions on any of this? Contact us to set up a consultation. The mechanics of receiving payments are not that difficult, but you need to make very sure you’re recording all payments properly and getting the money into your bank accounts.
Accounting takes time. And the last thing you need when you’re working with your company’s finances is activity that takes unnecessary minutes. If you’ve created a record or transaction once, you don’t want to have to enter the information a second or third time.
That’s why using QuickBooks Online is so far superior to manual accounting. It remembers everything, so you can use data again when you need it. But sometimes you have to give it a little guidance.
That’s the case with recurring transactions . If you have forms that you create repeatedly, with very few changes (like utility bills), you can “memorize” the transactions. When the bill comes around the next month, you can modify any details necessary and dispatch it again. Here’s how it works.
Three Options
To get started, enter a transaction that you want to save and be able to use again (with changes). Let’s say it’s an invoice that you send to a customer once a month who has a service contract for network maintenance. When you’ve completed the form, look toward the bottom of the screen and click Make recurring . The screen will now read Recurring Invoice , with new content as pictured below.
You can specify transactions as recurring and add details like frequency and start/end dates.
If you want to change the Template name to something that will remind you of its purpose, you can do so. In the field beneath Interval , select Daily , Weekly , Monthly , or Yearly , and then indicate what day of the month the transaction should occur. Enter a Start date and End [date] or select None if the length of service is open-ended. In example above, you would receive a reminder from QuickBooks Online three days before the invoice is scheduled to go out. The service contract has no ending date, so you’d continue to get reminders until you change the template.
Next to the Template name is a field labeled Type . QuickBooks Online gives you three options for taking action on the recurring transaction. It can be:
· Scheduled . This is an automated option that should be used with caution. If you select this, your transaction will go out as scheduled with no intervention from you. Only the date will change.
· Reminder . QuickBooks Online will send you a reminder ahead of the scheduled date. You can specify how many days ahead you should receive it. Then it’s up to you to make any necessary changes and send it out.
· Unscheduled . QuickBooks Online will do nothing except save your template.
When you’ve completed all of the required fields, click Save template in the lower left.
Using Recurring Transactions
If you’ve chosen the Scheduled option for any transactions, you don’t have to do anything more with it until you want to change its content or status. To find your list of recurring transactions so you can process any that are you earmarked as Reminder or Unscheduled , click the gear icon in the upper right of the QuickBooks Online screen. Under Lists , click Recurring transactions .
The Recurring Transactions table
The screen that opens displays a table containing all of your recurring transactions. You can learn just about everything you need to know about those transactions here: Template Name , Type , Txn ( Transaction ) Type , Interval , Previous Date , Next Date , Customer/Vendor , and Amount .
The last column in the table, labeled Action , opens a menu that displays different options depending on the type of transaction. For our Reminder example, you can:
· Edit (edit the template, not the transaction)
· Use (opens the original transaction that you can edit, save, and send)
· Duplicate (duplicate the template)
· Pause (stop sending reminders temporarily)
· Skip next date
· Delete
Looking Ahead
We’re a month into 2023 now. What does this year look like for you? Is QuickBooks Online doing everything you need it to do? If you’re starting to outgrow your version, we’d be happy to consult with you about upgrading to another service level (Essentials, Plus, or Advanced). Or if you know the version you’re using is supposed to do something you need but you can’t quite figure it out, let us know. We want 2023 to be a good year for you, and we’d like to make your accounting work as painless and productive as possible.

There was a time when leaving the office meant you were done with work for the day. These days, many homes are the office. And easy mobile access has made it difficult to get away from work.
That can be a good thing, especially if you’re a small business owner who must keep a close eye on what goes on outside of regular hours. Many productivity websites have mobile companion apps that make it possible to pick up where you left off when you were sitting at your laptop or desktop.
QuickBooks Online is one of them. Its mobile apps (iOS and Android, which look and work similarly) can’t replicate absolutely everything on the website. For example, you can’t work with projects or pay contractors or define sales taxes or run most reports. But they do a good job of providing the tools you’d most likely need when you’re away from your regular workspace. Let’s take a look at them.
A Terrific User Experience
Intuit did a great job designing its mobile apps to be easy to use on small screens. It takes very little time to learn how to navigate around, and individual working screens are clean, attractive, and understandable.
When Should You Use the Apps?
There are only two things that QuickBooks Online’s apps can do that the desktop version can’t: track mileage and snap photos of receipts. There are other situations when it’s very convenient to have the apps available, like creating a sales receipt or invoice for a customer in person, adding basic details for a new customer or vendor, or checking your account balances. It’s probably best to do the bulk of your work on your desktop or laptop when you can, to avoid errors caused by small—and abbreviated—screens.
Navigation Icons
The apps open to a screen called Today , which is their version of a desktop application’s Dashboard. There are links to actions like creating an invoice and looking up a customer, as well as a to-do list, the QB Assistant (a support tool), your account balances, a link to recent transactions, and real-time information about the status of your invoices and bills.
The other three icons at the bottom of the screen serve as navigation tools. The one on the far right labeled Menu opens two screens that can be toggled back and forth. One is Shortcuts , pictured below, a series of links to common actions. The other, All , opens a more traditional, comprehensive menu of links to individual app functions, like a Profit and loss report, Sales receipts , and Products & services .
The QuickBooks Online app’s Shortcuts screen
Besides those functions, there are links to other financial activities on the All screen. The ones you’d be most likely to use remotely are:
● Transactions. The ones you’ve imported from your banks are available via this shortcut, as well as any you’ve entered manually on your desktop or phone. You can also get to the list by clicking on an account name on the Today screen.
● Receipt snap . Using your phone’s camera, you can take a picture of a receipt. The app will pull some of its data and deposit it on an expense form that’s accessible on the app and the desktop version, where you can fill in the blanks and see the picture.
● Invoices and Estimates . View, modify, and add them.
● Customers and Vendors . Abbreviated versions of your records.
● Expenses and Bill Pay .
● Mileage . Enter trip data manually or automatically, through your phone’s location services.
Data entry on the mobile apps is as easy as it is on the browser-based version of QuickBooks Online.
About Your Business
Another bottom-of-screen icon takes you to My business , which provides an update (charts and numbers) of your income, expenses, and profitability. And another is Cash flow . Cash flow is actually a pretty complex accounting concept that you can’t fully absorb on a mobile phone screen, but it’s very important that you have a good understanding of how your company is doing. You can ask us about this.
Give It A Try
January is always a good time to develop new habits. We’ll be talking about some of these next month, but in the meantime, you might download and explore QuickBooks Online’s mobile app. You probably won’t need our help learning to use it, but we’re always happy to step in and assist when you’re having trouble with desktop QuickBooks Online.
December always goes by so quickly. Seems like you’ve just finished Thanksgiving dinner and it’s time to ring in the New Year. You could probably spend the entire month on your personal obligations. But it’s also the end of the year, which means your busiest period if you’re a retailer. Even if you’re not, you probably have sales goals to try to meet. And you may have employee issues that need to be addressed before the calendar turns over.
On top of all of this, you should be closing out your books for the current year (as much as you can) in preparation for the new one. If you’ve been using QuickBooks Online conscientiously all year, your job will be a lot easier. But you’ll still need to carve out some time for year-end tasks.
We don’t expect that you’ll necessarily be able to wrap absolutely everything up by New Year’s Eve. You may be waiting for your customers and employees to do their part. But here are five things you can do amidst all of your other personal and professional plans that will help you get a jump on January.
Analyze your 2022 sales.
You won’t have your final numbers until the year is over, but you can get a good start in December. There are several QuickBooks Online reports that can give you a clear, understandable look at your 2022 sales. Click Reports in the toolbar and scroll down to Sales and customers . You can run reports that will tell you what your sales were by Class , Customer , Customer Type , and Product/Service , in summary or detail. The reports are customizable, so you can specify date ranges and group the results by, for example, Transaction Type , Customer , and Account .
You can customize and run QuickBooks Online’s Sales reports.
Warning: If you’re not clear about whether you should run reports in Cash or Accrual mode, let us help you with this. The distinction is important.
Know What You Owe
If money is tight at the end of the year, this will be a challenge. But you don’t want to come back from the holidays to a lot of past-due notices. To see what still needs to be paid, click Reports again and scroll down to What you owe . If you want the straight scoop right away, run Unpaid Bills . For a more detailed look, create the Accounts payable aging detail report. This groups your outstanding payables by days past due.
Know Who Still Owes You Money
This is a question that’s probably on your mind all year, but it’s especially important as the year winds down. It may be difficult to get delinquent customers to pay up in December, but you should at least know where you stand with them. Click the Reports tab again and scroll down Who owes you . Generate two reports there: Accounts receivable aging detail and Open Invoices .
You might also want to spend an hour coming up with some strategies that would encourage customers to pay faster. If you’re at a loss about this, we could sit down together and come up with a plan.
Create statements for past-due customers
Customer statements are something like reports. They display sales transactions within a given period. Statements can serve two purposes. Sometimes, customers just want a list of their invoices and payments for their records. You can also use statements as a reminder to customers who are past due on their accounts. Click New in the upper left corner, and then click Statement under Other . There are three types, but you’d be most likely to create and send two of them:
● Open Item . Displays all open, unpaid invoices for the last 365 days.
● Transaction Statement . Lists all transactions for the selected date range.
You can send statements to customers to remind them of overdue payments or just to provide a record of transactions for a given period.
Clean up your customers and vendor lists
If you only have a few of each, your list is probably current. But if you’ve been adding customers or vendors for years without ever editing the list, you’re probably spending too much time scrolling. You don’t have to delete them. You can just make them inactive. Click Sales in the toolbar, then Customers . If you know a customer has no open activity and you want to hide them, click in the box in front of the company or customer's name. Repeat this for as many as you want, then click Batch actions in the upper left, then Make inactive .
A Busy Month
Don’t worry if you don’t get to all of these by the end of the year. But do add them to your January task list if you don’t. You might also consider having us run the standard financial reports that are available in QuickBooks Online Reports , under For my accountant . You can create reports like Trial Balance yourself, but they can be hard to analyze accurately. We’d be happy to set up a time after the first of the year to go over these after all of your 2022 transactions are in.
“Best practices” is a phrase that human resources professionals have been using for decades. But every type of profession has its own best practices, whether they call it that or not. These guidelines are not enforceable rules, though some managers may build them into their official policies. They just describe the way work should be done to achieve optimal outcomes and keep data organized and secure.
You may have heard of Generally Accepted Accounting Principals (GAAP) . Public companies are required to adhere to them, and many other businesses large and small follow these rules and procedures.
We’re not going to discuss GAAP in this month’s column. Rather, we’re going to talk about more general best practices for accounting, actions you can build into your QuickBooks Online work to make that time more productive and in line with what other successful businesses do.
How Do They Help?
Accounting best practices have numerous benefits. For example, they:
· Help maintain the integrity of your QuickBooks Online data files.
· Improve the accuracy of your accounting work.
· Save time.
· Provide insight on the financial health of your business.
When you incorporate best practices into your work, you may even find that your relationships with customers and vendors get better because you’re handling their businesses ? conscientiously.
7 Suggestions For You
Here are seven guidelines that we try to follow. We hope you will, too.
Track your 1099 vendors
If your
business employs contractors, make sure that you indicate their 1099 status in
their vendor records.
Changes in the economy over the last few years have led some people to
take on part-time (or even full-time) contract work. You should be creating
vendor records for these individuals. Click Expenses
in the tool bar and then select the Vendors
tab. As you’re completing a record, you’ll see a section
labeled Additional info
. Check the
box in front of Track payments for 1099
.
You can create and deliver your 1099s using QuickBooks Online when the time
comes.
Reconcile, reconcile, reconcile
Once you’ve downloaded cleared transactions from your financial accounts, it’s important that you reconcile them. This is probably one of your least favorite tasks to undertake, but QuickBooks Online simplifies it for you some, walking you through the process. Reconciling accounts regularly can help you:
· Discover errors and missing transactions.
· Get a more accurate picture of your cash flow.
· Make your reports more precise
Keep your lists up to date
Your QuickBooks Online company file can grow substantially over the years. Though the site has great search capabilities, you may still be scrolling to find the entries you want. This isn’t as big a problem for lists like Payment Methods or Terms , but overly lengthy lists of Products and Services , Customers , and Vendors can become unwieldy over time. Try to keep them current. If you don’t want to delete them completely, you can make individual records inactive by clicking an Action link in the listing table for each.
If your QuickBooks Online Lists are getting too lengthy, you may be able to make some of the records Inactive .
Categorize and classify everything that you can
Your QuickBooks Online company file consists of hundreds or thousands of individual records and transactions. Though each is a separate entity, there will be many times when you want to be able to assemble groups of related ones. For example, you might want a list of all of your customers in a specific ZIP code or all services that go into the creation of a marketing program.
There’s more than one way to get this information quickly. You can customize reports. Assign Classes , Categories , and Tags . View a Project . Whatever method(s) you choose, do use them consistently. They can provide insight in a wide variety of ways that will help you make better business decisions.
Warning: Before you start making lists of these classification tools and assigning them, think carefully about what they should be. You can always add to and edit the lists, but you’ll want to make them as focused and flexible as you can. Let us know if you need help with this.
Assign user permissions carefully
QuickBooks Online makes it possible to restrict users to specific areas and functions on the site. Use these tools. You can find them by clicking the gear icon in the upper right and then Manage users . You trust your employees or you wouldn’t have hired them, but you need to put controls in place to protect your sensitive company data.
Use QuickBooks Online’s reports
Are you taking advantage of QuickBooks Online’s report templates? It’s absolutely essential that you keep up with reports in areas like Who owes you and What you owe . We can help with this. We can also generate and analyze the standard financial reports that you occasionally need, like Statement of Cash Flows and Profit and Loss .
Don’t leave QuickBooks Online running and walk away
This should go without saying if you’re in a multi-person office. Also, don’t use the QuickBooks Online mobile app on a public Wi-Fi network when you’re out and about. Your company file contains information about your customers, vendors, and employees that should never be compromised.
More Than Common Sense
These best practices may seem like common sense to you if you’ve been using QuickBooks Online for a while. But when you first start using web-based financial applications, they might not be second nature to you. That’s why we’re sharing them with you, to remind you that conscientious use of QuickBooks Online is critical to the safety, accuracy, and usefulness of your company data. As always, we’re here to answer any question you have.
Your first impression of a business probably comes from a website or a mailing or an advertisement. The second might be from an invoice or sales receipt. What does it say about that company if its printed or digital sales forms are poorly designed or hard to read or just plain unattractive?
Customers form opinions about you not only from the quality of your products or services, but also by the professionalism and aesthetics of your written communications. Putting some effort into making them look good isn’t superficial. It’s an important part of your branding.
QuickBooks Online provides the tools you need to make your sales forms appealing, understandable, and consistent. They enhance your image and have impact on your customers’ overall impression of your business. Here’s how you can make them a part of your identity.
Where Do You Start?
QuickBooks Online comes with a default invoice form to get you started. You can either edit this one or create a new one. You can also make your own estimates and sales receipts.
Click the gear icon in the upper right corner and select Custom form styles under Your Company . You’ll see the default invoice labeled Standard . We’ll leave that one as is and create a new one so there’s always a clean version. Click the down arrow next to New style in the upper right and select Invoice . You’ll see a copy of the default invoice, like this:
This is QuickBooks Online’s default invoice template. You can make a copy of it and modify it for your own company.
You’ll see your modification options in the left pane of this screen. Your choices are divided into three different sections. Before you start working with them, enter a name for your new template in the field at the top. QuickBooks Online will have suggested a name, but you can change it to something descriptive that you’ll remember, like My Modified Invoice 1022 .
Changing the Form’s Look
The first tab, Design , should be highlighted. From here, you can:
· Change up the template . Choose from one of the six options that QuickBooks Online offers.
· Add a logo . Browse your system files to find your logo.
· Splash on some color . Select a color palette from the ones offered.
· Get choosy with your font . Select a new font type and size.
· Edit print settings . Change the margins and other print options.
Editing the Content
When you’re done there, click the Content tab. You’ll notice that your invoice, which appears in the right pane, is grayed out. There are three pencil icons on the right side of the form. Click the one in the upper right corner, next to the invoice number. The top third of the form becomes active, and the content in the left pane changes to match the fields on the right. As you make changes in the left pane, like checking a box to add a phone number, the actual sample invoice changes to reflect that.
When you add, edit, or delete content in the left vertical pane…
…the changes are reflected in the sample invoice in the right pane. Your company information will appear like this across all of your sales forms.
As you click on the other two pencil icons in the sample invoice, the left pane displays your options for those content areas. You have control over all of the content on your forms. It’s even possible to add your own custom fields. Let us know if you want to do so and we’ll show you how.
Readying Customer Emails
The third tab on the customization screen, labeled Emails , shows you what your form will look like when you email it to your customer. Again, your working area is in the left pane, with the finished result appearing on the right. You have multiple options here, including text for the subject line, greeting, and message. You can also edit the text for reminder emails.
When you’re done customizing, you can preview the PDF that will be attached to your customer emails. Then click Done . Your new invoice will appear on the Custom form styles page. Whenever you want to modify an existing sales form, click Edit at the end of its row. You can also make any form the default by opening the Edit menu and clicking Make default .
Making your sales forms the best that they can be doesn’t really take that long. And it will demonstrate to your customers that you care not only about the quality of your products and/or services, but also about your communications with them. If we can be of any help as you work with forms modification in QuickBooks Online, please let us know. We’ll be happy to walk you through the process.
If you’ll recall, we went over two product-related concepts in QuickBooks Online in last month’s column. We first discussed getting the site ready for creating and using product and service records. You click the gear icon in the upper right and select Account and Settings , then click the Sales tab to indicate your preferences.
To create a product or service record, you hover your mouse over Sales in the left vertical pane on the main page and click Products and services . Click New in the upper right corner and open a blank record for an Inventory or Non-inventory part , a Service, or a Bundle (assembly). Once you complete a record and save it, it will appear in the list back on the Product and services page.
Working with Products and Services
That’s where we’ll start today, on the Products and services screen. This is a comprehensive table, a dashboard (or home page) for your products and services. It displays real-time information about your items’ pricing and inventory levels, as well as their type and tax status. At the top of the page, you’ll see big, colorful buttons that provide a total of the number of items that are low on stock or out of stock. When you click on one, a list of those products appears.
QuickBooks Online’s Products and services page displays inventory levels and warns you when your stock is low and at zero.
Each row on this screen contains details about the item listed there, like Description , Sales Price and Cost , and Qty On Hand . If you look down at the end of the row, you’ll see options for several types of Actions : Edit , Make inactive , Run report , and Duplicate . Click the gear icon above the table to modify the columns in the table.
The More menu at the top of the screen contains more options: Manage categories , Run reports , and Price rules . If you want to know what actions you can take on multiple items simultaneously, check the box in front of each and click the Batch actions menu, over to the right ( Adjust quantity , Reorder , etc.).
Warning: Be very careful using the Adjust quantity option. There are legitimate reasons for employing it, but you need to make very sure that you understand how this will affect other areas of your accounting. Please ask us if you’re unsure.
Using Products and Services in Transactions
Once you start using product and service records in transactions, you’ll see why we suggested that you create those early on and make them as comprehensives as possible. While you can add products and services in the process of creating an invoice, for example, it’s much easier if you have them ready to go.
Let’s look at a sales receipt to see how this works. Click +New in the upper right corner and select Sales receipt . Select a Customer in the first field and verify that the related fields on the form were filled out correctly. Check and make any changes necessary in the Sales receipt date , Payment method , and Deposit to fields.
Once you’ve built up a list of products and services, they’ll be available when you create transactions.
Enter the Service Date , and then click the down arrow in the field under Product/Service . The top of the list has an entry labeled +Add new . Click it if you need to add a product or service on the fly, or just select the existing one that you want. QuickBooks Online will fill in the Rate , Amount , and Tax (status). You only have to enter the Qty (quantity) that you’re selling.
If you have more items or services to add, you can do so on the next line(s). When you’re done, check the numbers in the lower right and save the transaction. QuickBooks Online will adjust your inventory to account for any items you just sold. You can see this change by going back to the Products and Services screen . Or you can run reports, including:
· Sales by Product/Service
· Product/Service List
· Inventory Valuation Detail
· Physical Inventory Worksheet
Supply Chain Woes?
It seems that the serious supply chain problems we were experiencing in previous months have eased up some, but you may still be having trouble stocking some items. We hope this isn’t affecting you too much.
QuickBooks Online, though, can help ensure that you know ahead of time when you must reorder. Its inventory-tracking capabilities can also alert you to items that aren’t selling well, so you don’t get overstocked on anything. And the ability to pull up product and service records when you’re creating transactions saves time and keeps your inventory levels accurate. Please let us know if you need assistance with this element of your accounting – or any of QuickBooks Online’s other tools.
